CNC Laser Station – Design (part 1)
I enjoy optimizing the spaces I work and live in, and the move of CNCROi.com to larger
offices gives a great opportunity to create some furniture and things I didn’t have room
for before to put together. I started CNCKing.com in 2008 and CNCROi.com producing awesome custom CNC services to businesses in 2015.
The current workspace that was set-up for our industrial wide-format Trotec Laser (Speedy 400 flexx) was always a temporary set-up but now will that we got a few big projects out the door, I have time to begin designing something perfect for that area of the shop.
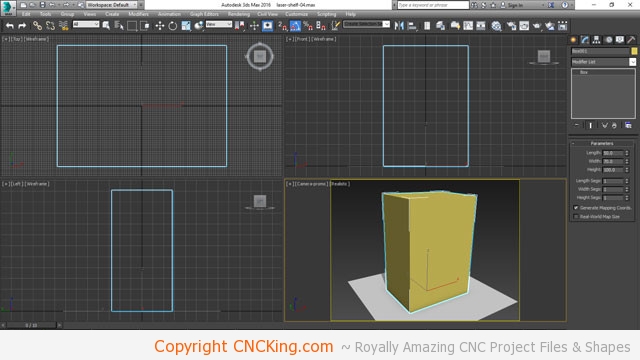
The area I have assigned for this laser set-up is 50 cm deep, 1 m high and 70-90 cm wide. So
the first step is to create a box so I know the space I have in Autodesk 3DS Max to play with.
Knowing the dimensions you want to build a piece of furniture into is critical as otherwise, you
end-up with something needing extensive optimization and modifications in real life after the cutting and engraving process has been completed.
My goal with both CNCKing.com and CNCROi.com is to build models that fit perfectly the first time and generally, hold together using only glue.
The material thickness I’m using for some of these shelves are 9 mm thick plywood that I got on sale at Home Depot. It was 50% off because somebody did a cut at one end of the full sheet and left it there, so they couldn’t get rid of it. For me, it was perfect as I could design around that cut.
The reason I use scrap for my own projects is because that’s how you learn the most from designing, anybody can make something using perfect materials, the challenge is when using anything but perfect. Of course, my clients get the best materials… but the lessons learned from scrap help to make the designs using perfect material all the better.
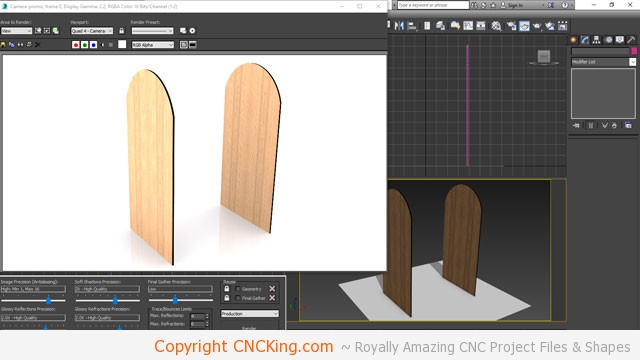
The most complex part of this relatively simple model will be the side pieces, they are
critical to get right as they establish my height, width and depth of the entire model. I
like having a rounded top with a square flat bottom (for now) so that I can easily create the
various shelves I will need in this piece of custom CNC furniture.
As this model will be laser cut, I have to keep that in my mind while designing it but I also want to make it easily modifiable at the same time to be done with my CNC router should I want
to make another for that area of the CNCROi.com shop. Our shop has both including a few other toys that I’ll be building custom furniture for throughout the year.

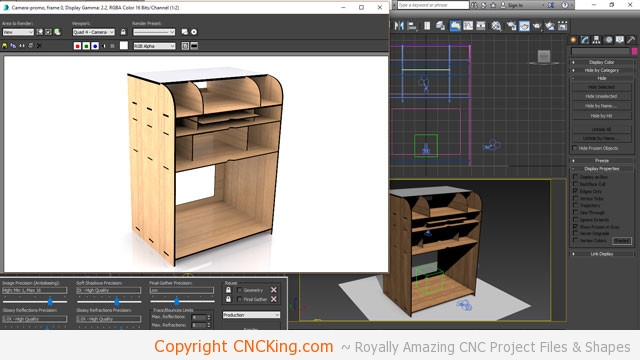
I now have a relatively simple shelf, nothing spectacular and if that was what the client was after, that’s what I’d design and build but as I’m using this as a showcase to demonstrate what is possible, we will have to leave “ordinary” on the curb and go for extraordinary instead. It will take a lot more laser time (hence production costs) but it’s fun to make stuff that isn’t typical yet optimized specifically for my needs in the shop.
This is the CNC laser station, where I need to have all the tools and base materials I use on a very regular basis contained within. This makes production far more efficient as I’m not running around the shop to grab X or Y tool or small material while also allowing me to quickly scan for supplies that may be getting low.
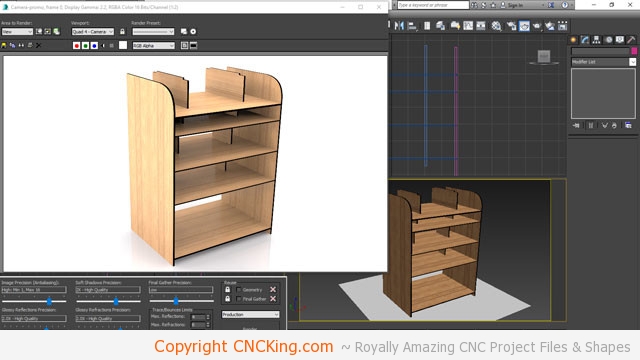
I will be using a few different thicknesses of material for this project, the top, bottom and sides will be done using scrap 9 mm plywood material while the inside shelves will be 6 mm MDF. Neither material is all that strong so I’m going to make an internal support system that locks into the top part of each shelf. What you see going from the top (will hold the laptop and mouse) almost all the way down is an additional support bracket that will allow me to create cross-section supports FLAT instead of vertical.
The problem with vertical supports for shelves is that they take-up room as you are limited by
what you can slide into the height of each shelf, by making them flat, you lose strength but by having a support structure going top down, you create strength right in the middle of the shelf where it’s most stressed. This also allows for a fantastic dissipation of weight, not that I’m putting much weight into this shelf but it’s fun to try new things to see if theories work out.
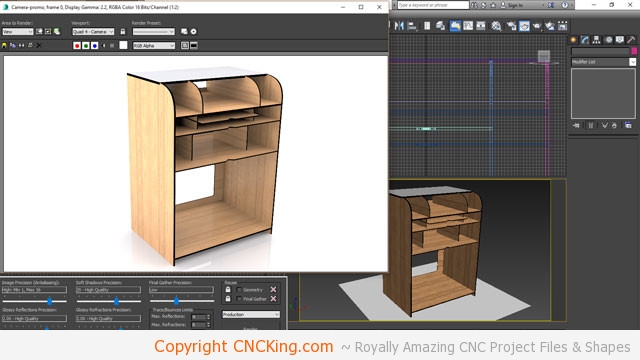
Next step is to extend these dividers front through back to act as cubby holes for my various
accessories and supplies – most of which are rather small and easy to lose, into the top layer of shelves. I want the top laptop to be slightly into the top, this creates more useful space for me on the shelf right below it.

I want the top surface to be nice and smooth with the texture almost the same as a dry erase whiteboard, this makes cleanup easy so there will be a layer of that added to the top. I’ve also strengthened the bottom shelf while adding a lot more clearance after doing some measurements of the vacuum I plan on putting which requires at least 40 cm of clearance.
So, the laptop and mouse will go on the top, followed by three levels of small things I need on a regular basis then larger items below. What I want to do next is check over the amount of material I have in the shop to make sure I have enough rough plywood and take additional measurements of various items that will be going into the shelf. There is nothing worse than making a custom piece of furniture then finding out what you wanted to put inside of it won’t fit.
I’ve now added small ledges on the back so stuff doesn’t fall through to the back and created an additional shelf in the front that will just slide-in for easier sorting as I have lots of flat stuff to put in here too. I’m still debating creating drawers for this CNC laser station that I’ve created as drawers tend to get filled with junk. As it stands, there is plenty of flexibility built into this model as it is. I now want to tighten-up the design and make it physically possible, so things like making interlocking holes into the various parts.
I’m thinking of adding-on a small slot on each side at this point to put things like rulers and other long pieces though adding a nail on the side would have the same effect without using more material. It would be a great option for small jigs as well so they are within easy reach.
I now have a model that’s possible to be created in real life, I do think though jigs would be best place on either side of the laser center than inside, so what I’ll to is use the tabs already created for this project at the bottom shelf going into the sides by extending them a bit and adding holders. This will dramatically increase the storage space while using minimal additional material. It will also help strengthen the overall design in the process.
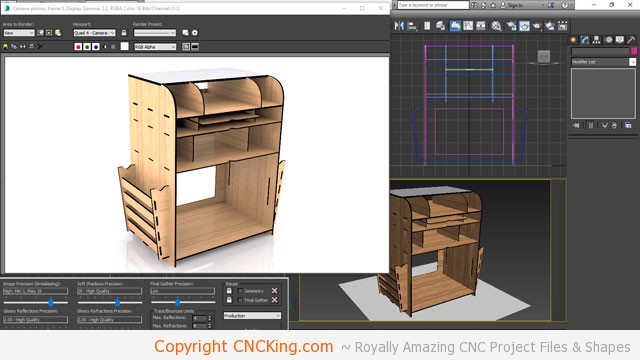
I’m pretty satisfied with how this model has come together now, it’s got more sorting options than my old set-up by far and will be a welcome addition to the shop. As I’m using the CNC laser to cut this part out, what I want to do is add additional engraving details on the side to give it a bit more perspective.
Although this adds to production cost, for me, the cost is negligible as this entire model will be built between production runs in the CNCROi.com shop. I can’t really think of anything this model is missing at this point in time so I’ll let the design mull in my head while I’m doing other work before finalizing the production files for it. I did use the thicker 9.5 mm material for the edges, it adds more strength than using just the MDF.