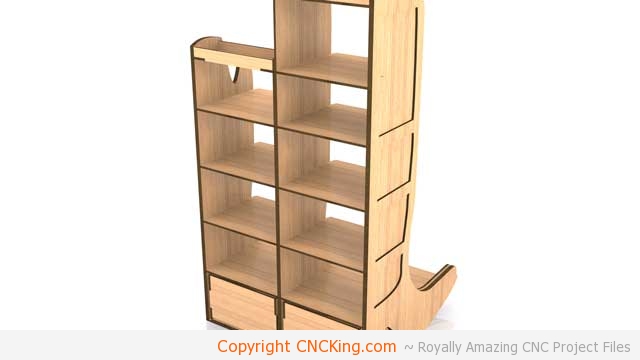
Boots Footwear Holder: Design Process #4
Plowing through… let’s finish this design and get it ready for CNC routing – though it could just as easily be made with a CNC laser here on CNCKing.com
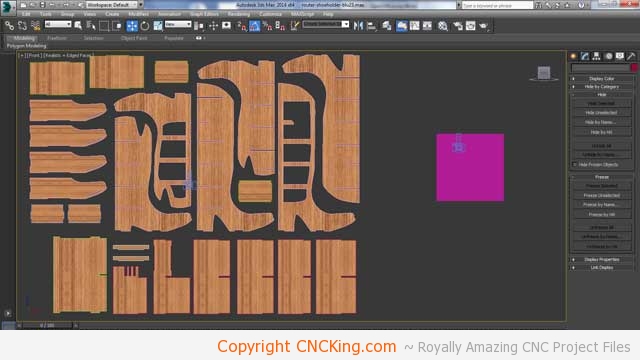
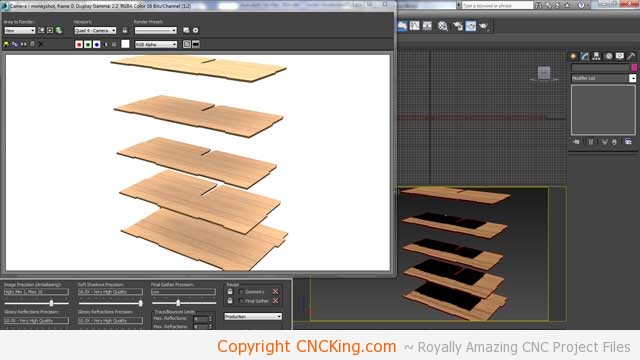
I broke-up the model into individual pieces, it’s always a surprise what a model looks like in 2D after working it for so long in a 3D environment. It’s pretty neat and makes me appreciate people who work in 2D exclusively to make a 3D model… I really don’t know how they do it!
Once I got rid of the 3rd dimension on my model pieces and exported the file to Adobe Illustrator format, I then measured my wood as everything is relative to wood thickness. My material is 6.5 mm thick so what I did was scale the entire drawing up by 10%. Having something slightly larger is better than having them slightly too small.
A slight problem… my height is fine when I increased the scale of the largest boot up by 10% but I completely forgot about the width, I’m a few mm more than what I can cut on my ShopBot Desktop so what I have to do now is go back to my 3D model and shave-off a few mm from their length. This is yet another reminder to me to get a full sheet CNC router ASAP! Tiling is something I’m proficient in but you still have limits to content with. This is why I tell everybody getting a CNC machine, regardless of type, get the biggest damn machine you can afford and then some!

I’ve shaved off 30 mm from the side of the boot, it will give me plenty of room and not really cost me at much in the grand scheme of things. You can seee the original line on the left and six squares over the new boot line. I have to update all the parts across the model to reflect this change. Although this is overkill, I prefer to do this change once than twice.
My shortest shelf is now 200 mm which is fine for my wife, she has small feet, but not for me. I want to extend the shelves out a bit more so what I’ll do is make the front come out a bit more so now my shortest shelf is 216 mm which when increased by 10% will make it just under 240 mm which is more than what I originally took off from the back while keeping the design virtually identical. By having such large feet, I know it can hold weight without tipping over either… so I don’t need to add a bunch of additional weight to keep it steady.
I do feel, while I’m making these changes anyways, I should add a stop to prevent the shoes from scuffing-up the back wall this will be up against but I don’t want these to be dark holes as a result so I’m going to create a very open stop. This requires more modifications to my design but I think it’s worth it. I’ll also add a stop for the bottom shelves so you can’t push them all the way through.
I’ve added slots on both sides of the back shelves so that something can be glued right against them securely. This will strengthen the overall design and prevent shoes from going all the way though the back as well as the bottom drawers.
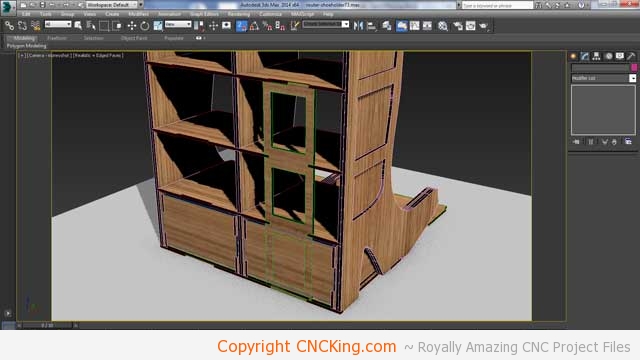
Do you see the problem in this screenshot? The bottom drawers are too long and go into the back shelving I created… this is the power of a digital design process because I can create things that aren’t possible and fix them before ever cutting my first board.
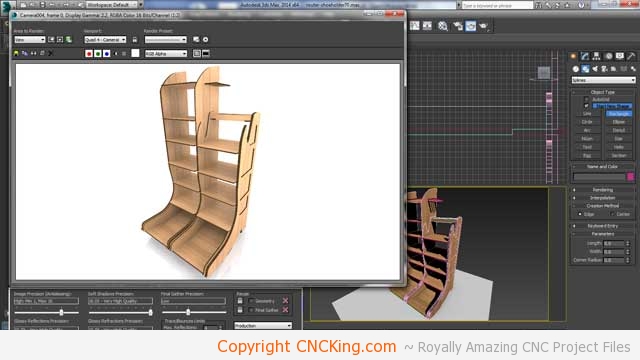
I took the opportunity to streamline the lower shelve’s top, making one of the back stops also make-up the actual back of the box. So although I created four new pieces to this project, I managed to streamline one of those out of hte model while making another unique piece so asssembly is all the easier! Time to break the design up into individual parts and making the cutting files!
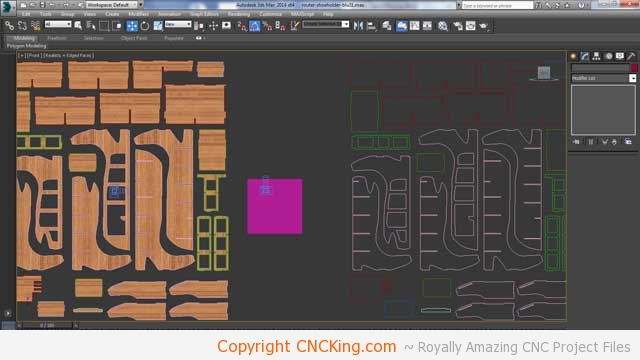
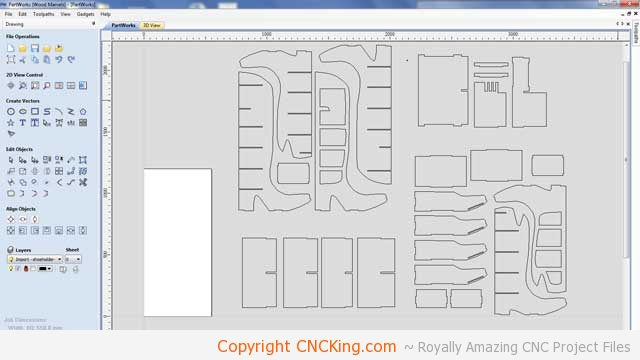
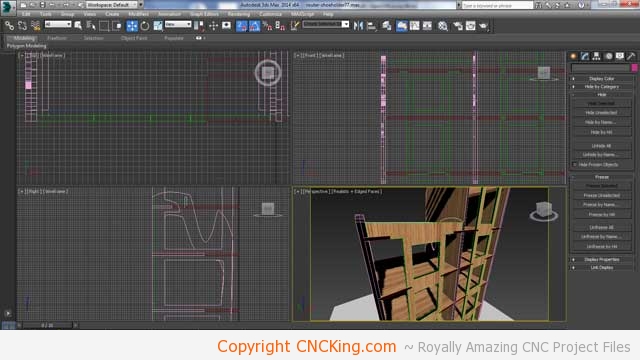
Everything is looking great so far, I have my original files on the left and my new outlines on the right. I can now export it into Adobe Illustrator, rescale correctly then export the new file to PartWorks.

I have to manually fix all the nodes across all the parts so that I can add the tool paths and fillets to all the inside corners. The entire project fits across seven sheets measuring roughly 600 x 1200 mm so it’s a good size project that should cut pretty quick as it’s only a total of 21 tiles.
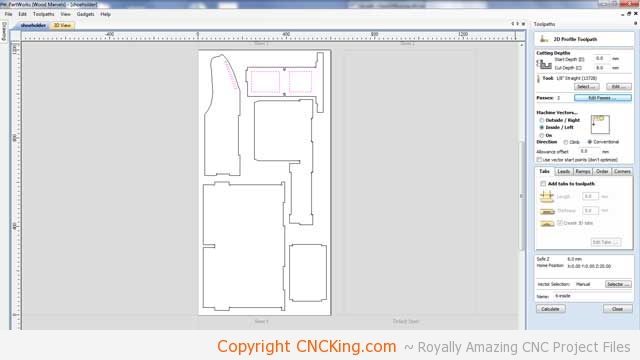
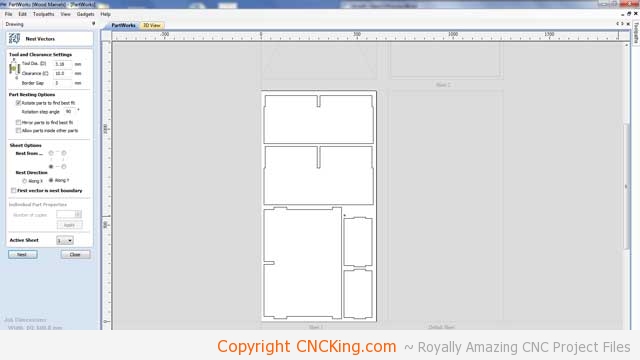
The tool paths go pretty smooth on this project as I’ll be putting the screws along the sides – I gave myself a border of 1cm which is plenty to hold the larger sheet size in place. A trick I discovered that allows me to cut through boards about twice as fast as normal as I’ve removced an entire tool path and screwing/unscrewing workflow.
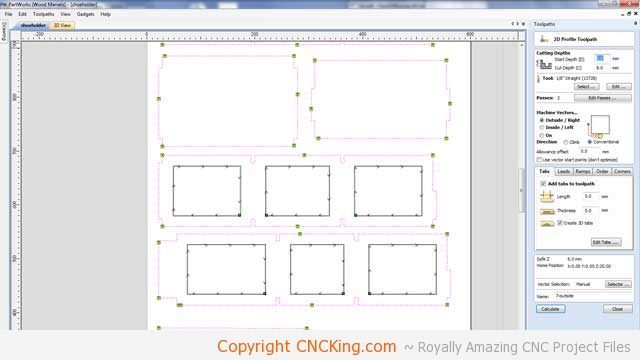
Although there is an automatic tab creation system that would save me time, more often than not, they are placed at less than optimal locations so I always place them manually at edges with more on larger pieces and less on smaller ones. I’m now finished all my tool pathing so I just need to export the cutting files to generate their G-code and cut away!