Boots Footwear Holder: Design Process #1
I have one pair of shoes and one pair of sandals, when they wear out, I go out and buy a replacement and throw the old ones in the garbage outside of the shoe store.
My wife on the other hand, needs dozens of shoes and it’s becoming messy in the front foyer as a result… I need something to keep her shoes, boots and sandals in place without tripping over them.
As this is going to be for my wife, I’m going to build CNC router woman’s boot holder as it has the height required for plenty of storage and the thickness to give my shelves a good level of depth. I also want it to double as a small table and a key holder… without further ado, let’s design then build it here on CNCKing.com!
It goes without saying that although this model is going to be designed and cut for my CNC router, it can also just as easily be cut using a CNC laser.
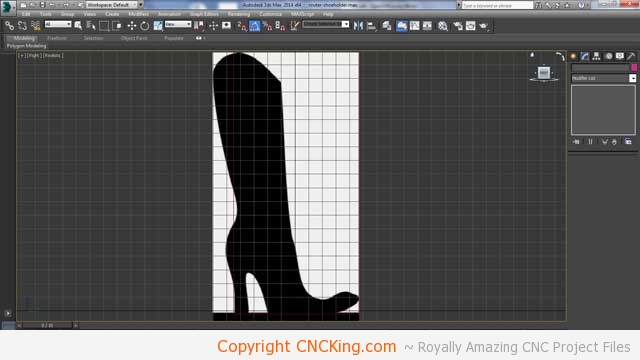
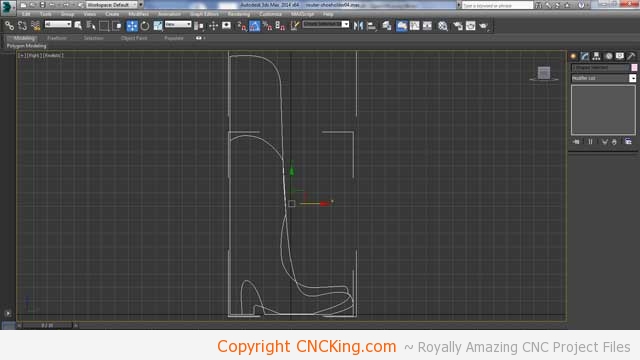
The first step is getting a reference silhouette that works within the parameters of my design. I built two boxes here, one shows me the maximum length and width of my CNC router cutting area – I will cut this out across three tiles using indexing – and the other is my silhouette. As this is going to be against a wall, I want the back to be flat. I will be making this slightly thicker as a result in the front as I have too much empty space and designing the shoe like the silhouette would just be a tripping hazard much like the shoes it will be storing.
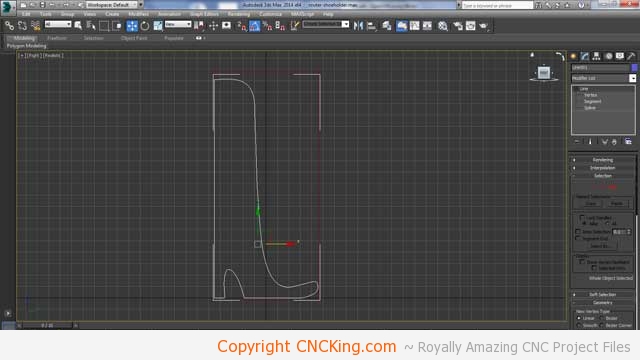
Now that I have my line drawing created, I no longer need the silhouette and I can modify the shoe to better suit the design and application I’m building this for. As this will have to be narrow, I have a few options. I can have a doubling or trippling of a shoe width to to create lots of shoe storage areas or, to make things a little more interesting… create this design to use both a cowboy boots on one side and woman’s boot on the other. This means, I have my storage area for MY two pairs of footwear and she has hers without mixing things up. This complicates the design but who cares, let’s do it!
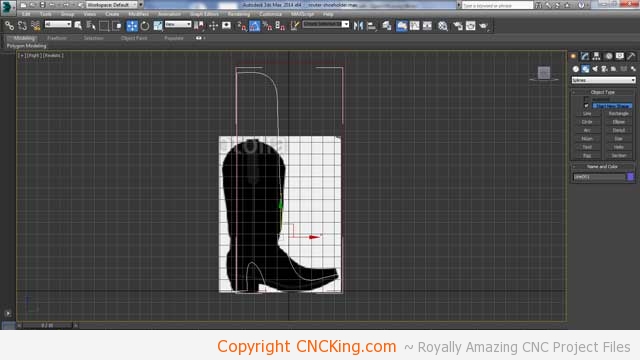
The woman’s boot goes all the way up to the knee but cowboy boots to up mid-way up the calf, so we have a height difference. I’ll put the cowboy boots on the outside with the woman’s boots on the inside and I brought the cowboy boot down a bit so that it fits within two tiles from the bottom instead of having it go across three. This means it will be more accurate (I do my indexing by eye) and it isn’t worth indexing a third tile that’s mostly empty for a boot top.
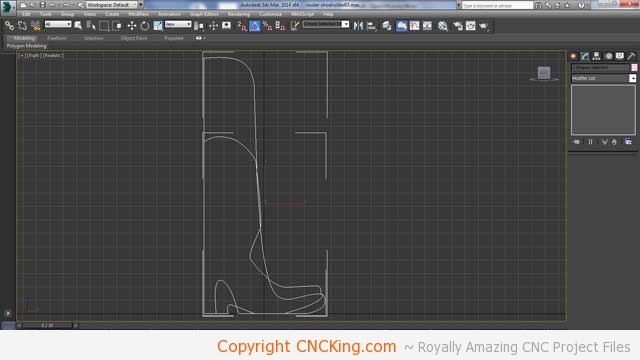
These shoes do have a different depths so what I’m going to do is give them the same. The first reason is that it makes the shelving easier to design for and esthetically, it will look better. I still have a few more modifications that are required to pull this off. I want the two line drawings to be more similar to one another, a few extra mm here and there won’t be noticeable when this is built to full scale, especially when it’s loaded with shoes and boots so now’s the time to make things mesh together.
The boots are now much closer to one another depth wise. Unlike my kangaroo shelf, I want these silhouettes to have have holes in the side but first I have to give these models some thickness to represent 6mm material thickness. I measured my wood thickness and in this case it’s 6.5mm so I’m going to give myself more tolerances along the length and width so that I can scale it up 10% without being off my maximum board size of 120 cm by 60 cm.
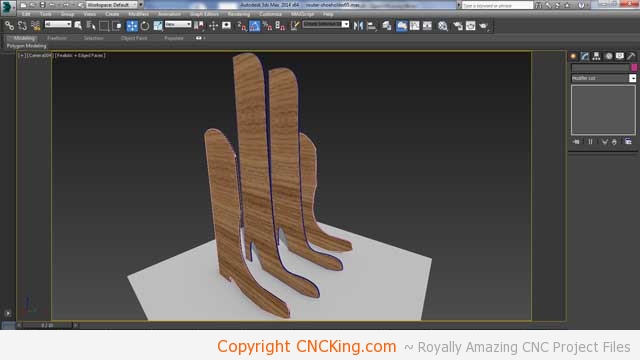
After giving the boots some thickness, it would look pretty awful to have it like my original idea and generally, you put your pairs of footwear together, not in between other pairs. As this will fit on the left of my front door, I’ll have the higher boots on the left followed by the lower cowboy boots on the right. Reaching over to a lower ledge doesn’t make sense if I’m going to store things on it momentarily before heading out. I also measured the width of two pairs of my shoes and if I give myself 30 cm, I have plenty of room.

This is looking better. What I will do now is double-up the sides of each set of boots for strength and to give them more presence. Once I have this sorted I’ll create the shelving. Also, by having the shorter boots next to the door gives me a method of hanging keys off the side of the taller boots.
part 8 in a few days…