Sydney Harbour Bridge: CNC Laser to Router Conversion 2 ~ Initial Modifications
This was originally designed for a laser to be cut using 6mm thick material but I wanted to make this CNC table routable, the simplest way to do this version for me is to bring the material thickness down to 4mm in my 3DS Max and then scale it back-up to 6mm within Illustrator. You can buy it right now (laser version) on CNCKing.com under buildings in the Laser heading.
I wanted to test the entire model virtually first and with my ShopBot Desktop, the maximum length of anything is roughly 400mm so this model will have to be indexed twice, so the length of the longest piece can’t exceed 800mm. In the previous volume of designs, I rebuilt all the models using only illustrator and manual trial/error testing, I want to avoid this as it wastes a lot of time, material and uselessly wears down my machine.
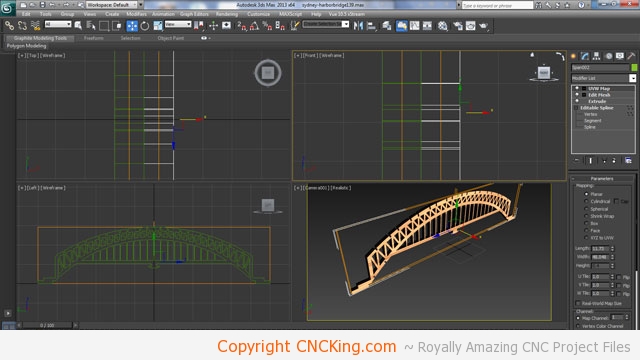
Although this model is going to be optimized for a table router (though you can laser cut any router model), I’m keeping the contrasting texture to help isolate problems that will happen during this design conversion process. Every aspect of this model will require some modifications and the more “help” and “pointers” to help isolate issues that may come-up with a table router, the better the final design will be.
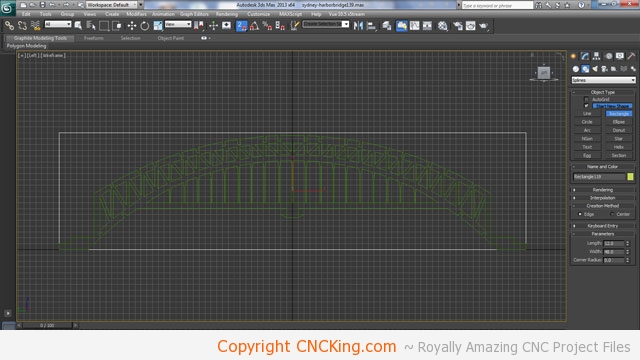
The first issue is resolving the biggest piece of the model first as that will present the biggest challenge as my surface isn’t large enough to begin with. I have a total width (length in this case) is 48cm, I can’t exceed roughly 80cm using 6mm. Rather than rebuilding the entire model from scratch, I’ll change thickness of that 48mm from 6mm to 4mm then scale it back up to 6mm within illustrator. As such, 4 —> 6mm is a difference of 150%. So, 48cm x 150% = 72cm with a height of 12 x 150% = 18cm. This works out great as it means I can cut two spans at once as my maximum width (height of the model) is 50cm… this gives me plenty of space and hold-down possibilities.
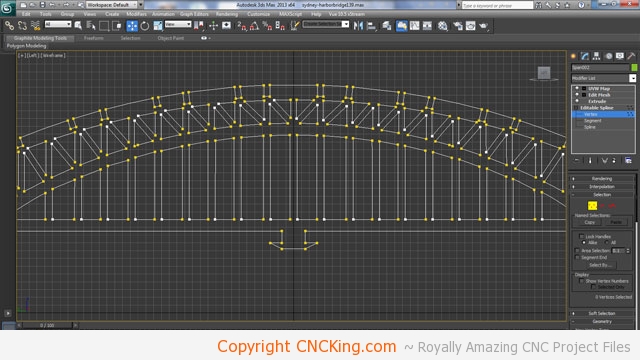
As this model will be very long and built out of plywood, I want to make it extra strong so the first thing I did here was remind myself that I want to double-up on the spans and change my grid parameters from 6mm to 4mm so references are easier to sort-out before going too deep into the design.
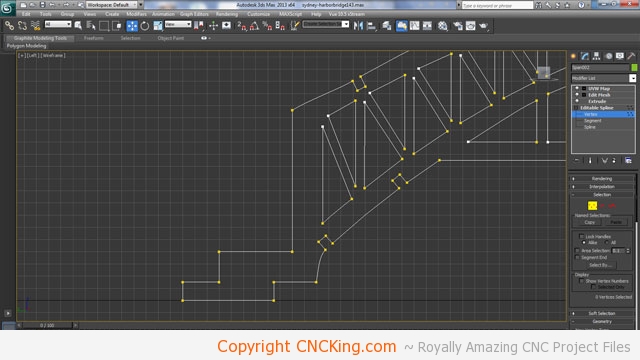
This model is NOT CNC router friendly, it’s borderline for lasers (in focus) but for a router that’s ripping and pushing through material, these little strings of material are going to be ripped apart. The solution is simple, make them thicker and increase the amount of tolerance throughout the pieces. One thing I can’t help is the sharp inner corners, as a router uses a round bit, those will be rounded and adding dog bones would look horrible. Each square in the picture represents 4mm and as you can see, the bridge supports are 2mm. When this design is increased by 150% (4mm to 6mm) that would make it 3mm. Still too thin. As such, I’m going to increase them to 4mm (which would be 6mm once scaled).
That’s looking far better, now I need to fix-up the top. Because all of these inner shapes will be rounded, I’m not too concerned if they are close to one another on the middle part because that will be automatically streamlined by the router but what is a problem is the very top, if I add dog bones there, it will go through the lower holes so that needs to be brought-up. I also removed a few extra nodes on my mesh – something I’ve started to do since this model was originally designed.
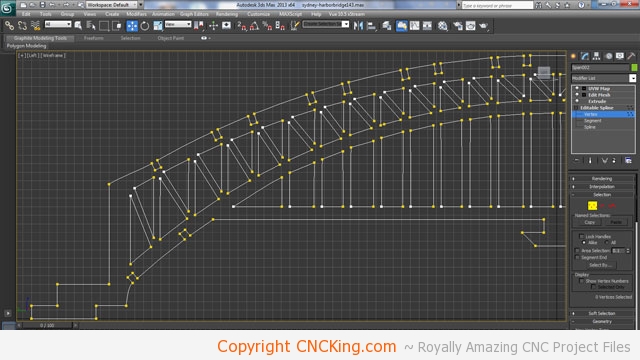
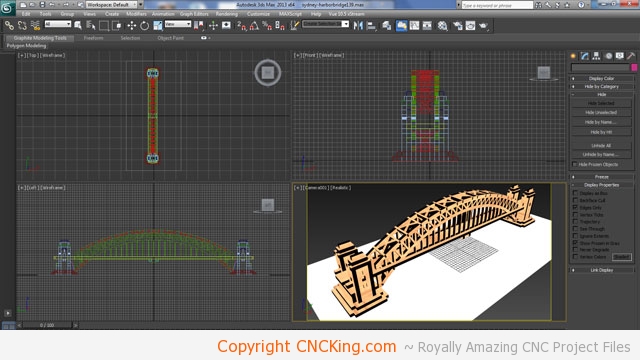
I’ve increased the height of the bridge and extended the sides to be slightly thicker just to make sure I have some extra strength built-into the model to lessen the possibility of it breaking apart during the routing process. The more tolerances you build into your model NOW the smoother things will go later.