Sydney Harbour Bridge: CNC Laser to Router Conversion 9 ~ Tiling!
Well, everything was going smooth until what seems totally logical didn’t work with my ShopBot Desktop. The ShopBot tried to keep going along the cutting path even though it wasn’t part of my Patworks board (see the picture above, left of the bit). I sent off a message to ShopBot Tools and they got back to me telling me if I “tiled” my design which I didn’t understand but this process is even simpler than my assumed method. Special thanks to Ryan for giving me excellent documentation to make this happen in record time!
Luckily, these slight changes to enable tiled cutting were mostly done in the previous blog article so let me give this another try – I’ve left my previous steps as not all software supports tiling and hey, learn from my mistakes!
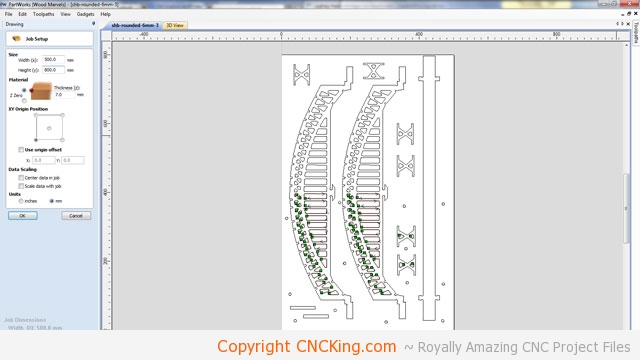
First step to tiling a design is changing my board size within PartWorks, I changed the height from 400mm to 800mm on my first sheet containing two (of four) spans.
Now that we treat the entire board as one cut, I added additional screw holes in the top portion and have to create tool paths for the entire project to be cut – as if it was going to be done in one shot.
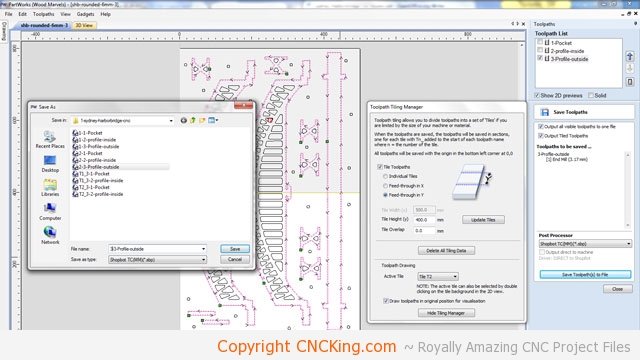
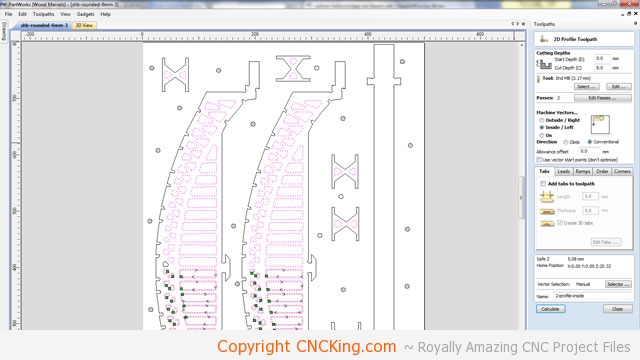
I’ve now divided my project into two where height (y) is 400mm which means I have to pass the board up one more time to get 800mm. All I need to do now is export all the cutting paths – as you can see, the two tiles are made at the same time but I have to remember to cut tile 2 before I cut tile 1 as for me, working closer going outside is easier on my ShopBot than the other way around as I’ll be doing my positioning by eye (hence no overlap). When I make even larger projects, I’ll take the time to make tabs and use round dowels for more precise positioning but as this is the first time I do this, I want to LEARN all that could go wrong instead of doing everything 100% to the book first time around.
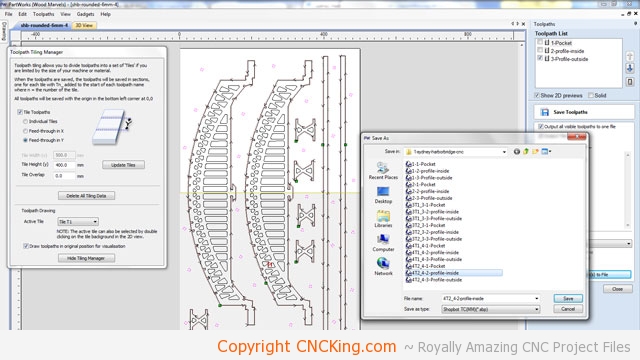
I now have all my cutting paths established for my second board of spans, I numbered everything in order regarding file name so the cutting process should be very straight forward. Next step is cutting!
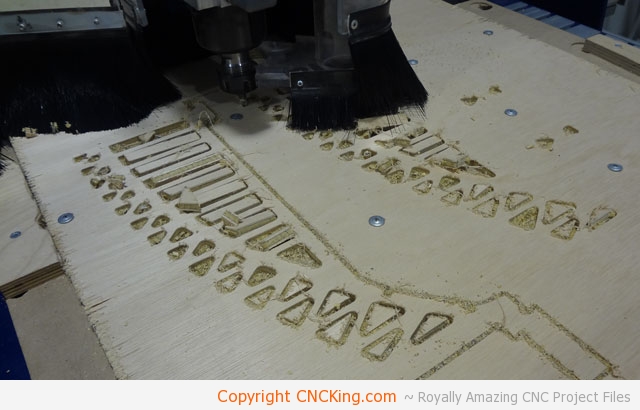
The results? Everything worked perfectly!

Positioning a project by eye takes less than a minute and if I was cutting spans that extended above requiring two tiles, a dowel and jig system would have to be needed but otherwise, I’m very happy with the results and 2-3mm off didn’t affect the design assembly in the slightest. By the way, my board was 6.5mm and not 6mm which caused me some grief for the outer spans but I’ll talk about that in the live cutting video.