Ferris Wheel B: Laser Cutting & Assembly
Laser cutting and assembling my Ferris Wheel B went very well, I had to scale the drawing a bit to suit the material thickness of my hardboard but it spun great.
It’s so strong that kids at my Maker Faire Booth spun it thousands of times over the course of the two days it was featured at my booth! I was concerned that maybe they’d wear out the gears especially as they tended to grab the wheel and not the gear to spin it around.
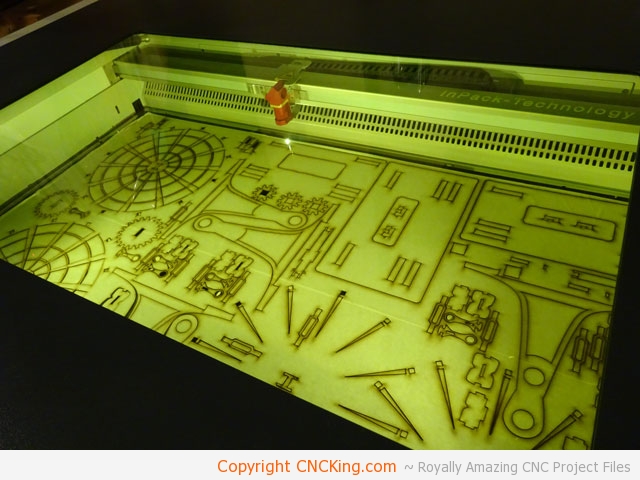
Cutting all the parts on one sheet and a bit was very smooth, the extraction keeps working great and with all the cutting I’ve done on my Trotec Speedy 400 flexx over the past month, I’ve only had to clean the lens once! Powerful extraction and a gas kit is just wonderful when mixed with a vacuum table!
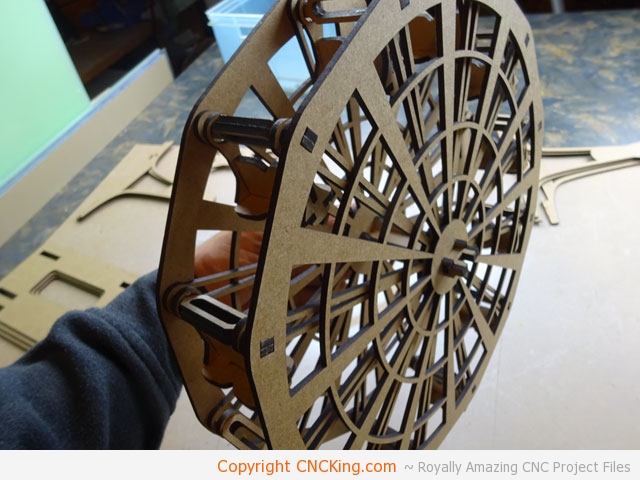
What I really liked was the wheel seats, they spun perfectly with almost no friction. This was another of my concerns with this model and was totally unfounded. The model is so light weight that the Ferris Wheel is very easy to carry around. I was quite surprised at how well it’s held-up!
I tested the spinning action and gears thoroughly before glueing everything together as I wanted to make sure my plans were accurate… I believe I made these gears by eye so a lot could have gone wrong which thankfully didn’t!

I did have a slight issue with interlocking at the top, it was hard to stick a clamp in the top parts to make sure they glued together propertly so I jammed a clamp that applied pressure to all three tall structures to keep everything tight until it dried.
You can find this model and a whole bunch more at CNCKing.com under CNC Laser… oh yeah, here’s the video showing the cutting and assembly process of this Ferris Wheel B.