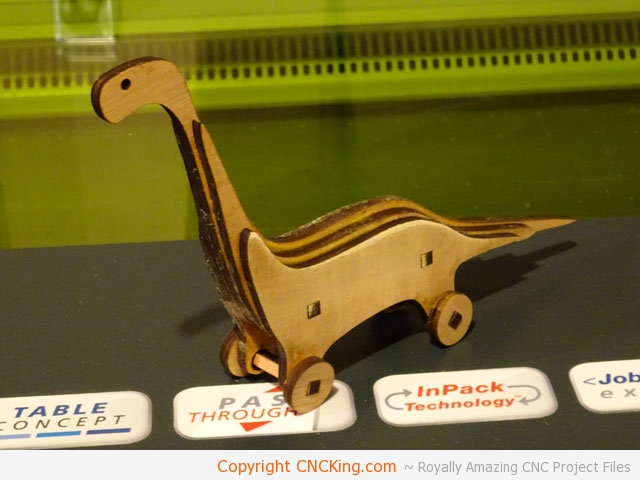
CO2 Laser Cutting a Wood Apatosaurus (Brontosaur)
It has surely been a while since I cut, much less designed anything for CNCKing.com – starting a brand new business has taken a crazy amount of time and that’s nowhere near a finished task over at CNCROi.com.
One of the reasons why I splurged and bought the best damn CNC laser on the market bare none (Trotec Speedy 400 flexx) is that I wanted to make videos proving that all the CNC laser projects here on CNCKing.com are actually work and are relatively easy to build. I get so many questions about doubting that this stuff actually is as easy as I portray in the 3D animations I make that I hope to post proof to put an end to it.
After this extended “time off”, I had time to rethink the way I do the videos here on the site especially now that my time is at an absolute premium… I think the new format you’ll see below is far more concise, gets to the point without all the filler I put into the old ones that took 10x longer to produce. Change is good and I like it!
If people want more information, all they need to do is come to the blog where I can write my experiences during the build process if they are interested. The idea for this new format came from my new company CNCROi.com where I didn’t want to have to stand infront of the camera over and over again saying giberish that most people simply are not interested in.
Anyways, long story short, this is actually the second time I cut this Apatosaurus (Brontosaur), the first time I masked the wood (on both sides) and stuck it in the Trotec Speedy 400 flexx and cut away… everything was great until I tried assembling it, the pieces were way too lose. It didn’t make sense? I had 6 mm material and it was acting like it was way thinner.
I took out my digital calipers… 5 mm! How can that be, I bought this at 6mm! Then I realized I’ve actually been GONE for two years and during that time, the plywood I had left here actually dried-up and lost a bit more than 1 mm in thickness as a result! I didn’t follow my own advice… and paid for it.
The results look alright but being a bit rusty in my model making skills after the wood has left the machine, I made a few mistakes. The mask you see below is right… worked awesome!
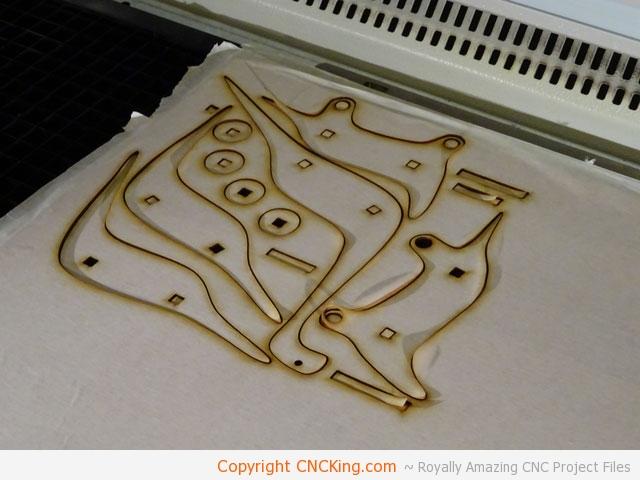
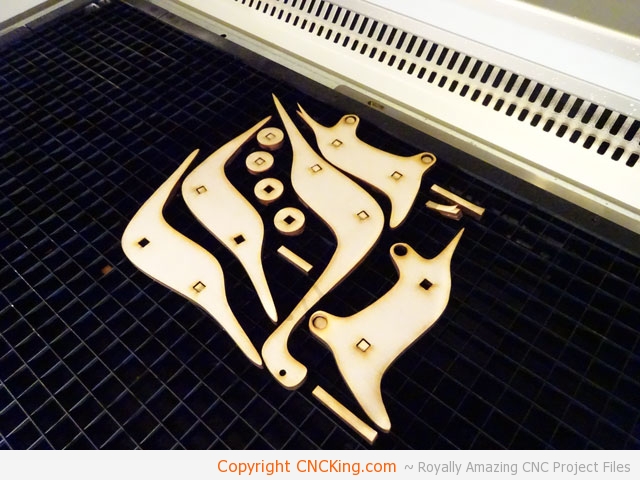
The pieces fell right out – my settings were dead-on!
Now the problem the second time around is glue, this is a different glue than I’m use to in Australia – PVA from Bunnings was great! This stuff flows a lot faster though and as a result, I ended-up putting way too much glue on the model which ended-up going all over my hands. The results aren’t pretty when mixed with the burned edges from the laser – I didn’t wipe the edges with a damp cloths as per protocol either.
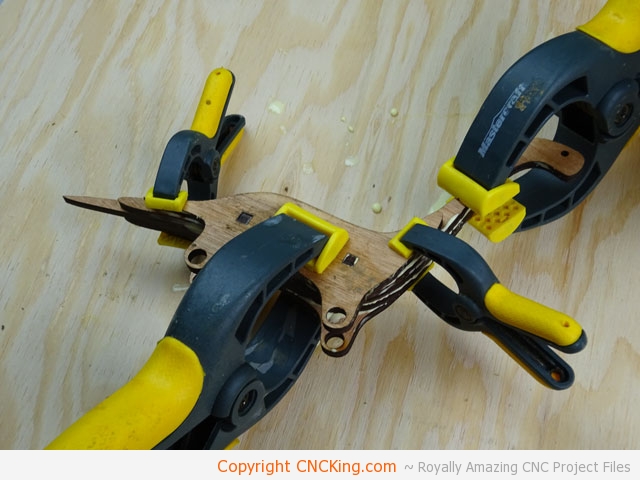
During all of this, the glue made the model move slightly while it was drying with clamps – they are of great help but tend to put so much pressure on the model that it tends to slide around a bit by a few mm during the drying process ESPECIALLY when you are using way too much glue! This stuff also set way faster than I’m use to.
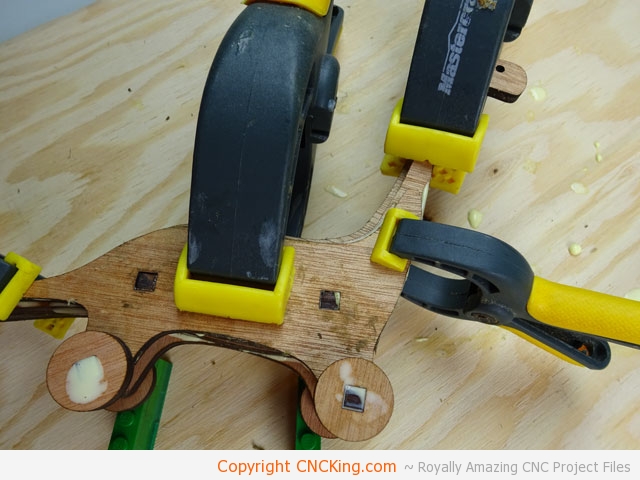
After some re-setting-up a few times, the model eventually dried, then I had to sand the excess glue which gives it a cool looking “wear and tear” on the back as you see in the completed model.
Overall, very happy with how this guy came-out… more coming soon! Start with the easy stuff, make your mistakes so that when it comes to more complex pieces they end-up being easy and done perfectly especially when the tolerances are tighter.
You can find this model right now in both CNC Router and CNC laser formats at CNCKing.com.