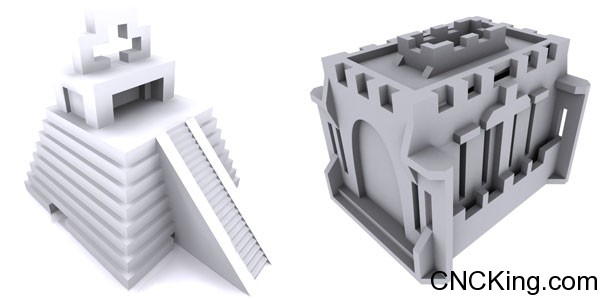
3D Printer Model Conversion: From WoodMarvels.com to 3DMarvels.com
I’ve made no secret to convert all my WoodMarvels.com models to be 3D printable – of course, while designing some new stuff too! There are three ways to go about doing this -this is but a glimpse of what needs to be done.
3D Printer Model Conversion: EASY
I’ve seen this at many 3D printing file resources, basically, the designer does exactly what I do, break-up a 3D object into 2D shapes which then need to be assembled and “glued” together. The advantage to this system is I could relaunch all of WoodMarvels.com products within a week on 3DMarvels.com but the HUGE disadvantage is that the design isn’t taking advantage to the opportunities 3D printing gives. So, the models are identical, you just print the 2D shapes instead of cutting them with a laser cutter or CNC table router. What’s the point of buying a 3D printer when you can build a model cheaper and faster using a laser cutter and CNC table router? That’s why I’m not going this way. It’s a waste of time!
3D Printer Model Conversion: HARD
As all my models are already 3D – the next step-up which is what I was playing around with was simply unifying the pieces, so basically, you have the same model as WoodMarvels.com but all the pieces are fused together already. The advantage is that everything is printed in one shot without assembly or glue but again, I’m not taking advantage of 3D printing. As you can see… what looks NEAT in wood looks downright boring 3D printed. REALLY BORING!
Timeline for converting a model is less than an hour in this case… though the model has lots of problems with a mesh that’s less than clean. With 3D printing, the more “messy” the mesh, the more problems it will experience during the 3D printing process. I’ve done a 3D model test using this method, results are OK but not optimal in my opinion.

2D model converted to be 3D printed
3D Printer Model Conversion: REALLY CHALLENGING!
As you can see, each step in the conversion process so far has been “cheating” in that the output file isn’t REALLY a 3D model meant to take advantage of modern 3D printers, it’s a patchwork of compromises that leaves much to be desired. The reason that the wooden models look good are because of texture of the grain, material color variations and cutting/burning marks in the model. Something that’s GONE with 3D printing as both the color and texture (using above methods) is uniform. So, what’s the solution?
Using the above Mayan Temple – notice how all the edges are uniform… in real life, this is made with cut stone – with wood, I’m limited to 6mm maximum workable resolution (wood thickness excluding engraving) and CNC table routers are even less. With 3D printers, the maximum resolution is a fraction of a mm. Put another way I basically have unlimited resolution ACROSS ALL 3 AXIS! (wood is only 2).
Going back to the temple, this increased resolution means that I can actually make the steps look like they are real carved stone, with rounded edges, chipped corners and because of the ability to print in the Z axis as well, make pictures and Mayan symbols appear on the vertical (Z-axis). I can also put the whole thing on a small bed of “3D printed grass” with foot prints, a few random heads and open spaces (holes in the model).
Not only that, the resolution is so fine that I can introduce moving parts that create traps, locking mechanisms and if I really wanted to go nuts, add a few tree roots going through the model with leaves on top. Basically, the power of 3D printers allows something that simply isn’t possible to do with any other technology (unless you build them at a massive scale). This is why it’s vital to TEST every model on the site, these might look amazing but if there is a flaw in the model, the printer won’t know and maybe you end-up with a missing step at the bottom that screws the whole model up.
When you are capable of creating anything… deciding when to stop is the most challenging part!
